Prepare and Upload Coco Labels to DATAGYM
In one of our latest Blog posts we introduced how to use our “Python API” to import annotated image data directly into your DATAGYM Projects. The feature enables users to inspect and correct the results of their prediction models from within DATAGYM. This article introduces our new Coco importer within our Python API. The importer helps you upload coco formatted annotated data into DATAGYM for additional labeling. The code samples in this guide are also available as a Jupyter Notebook on GitHub.
Check it out and register your DATAGYM account here – it’s free!
What is Coco
Coco is a large-scale object detection, segmentation and captioning dataset. Coco has several features like object segmentation, recognition in context, 80 object categories, over 200k labeled images and 1.5 million labeled object instances. Learn more here: http://cocodataset.org/#home
The Coco dataset comes with its very own label format for each of the label categories: Detection, Captioning, Keypoints, Stuff, Panoptic. The Coco import function within the DATAGYM Python Package currently supports detection and captioning.
upload_dict = coco.get_datagym_label_dict(image_ids_dict)

import pprint
pprint.pprint(upload_dict[0])
Connecting and setting up
Let’s get started by importing our DATAGYM client and the Coco importer.
from datagym import Client
from datagym.importers.coco import Coco
First we must define which project and dataset we will be working with. The project needs to be manually set up in your browser.
PROJECT_NAME = "Coco"
DATASET_NAME = "coco_val2017"
Connect with your personal API key and get your project by name.
client = Client(api_key="<API_KEY>")
project = client.get_project_by_name(project_name=PROJECT_NAME)
Create new dataset. Here we wrap the dataset creation in a try/except clause in case the dataset is already created.
import warnings
from datagym import ClientException
try:
    dataset = client.create_dataset(name=DATASET_NAME, short_description="Images from the coco validation set 2017")
except ClientException as e:
    warnings.warn(e.args[0])
Now we create our list of image urls that we want to upload to our dataset. This list of urls won’t necessarily be the same for you, depending on where you have saved your images. In this case we chose to create a list of the coco_urls that are provided within the coco json files.
import json

image_url_list = []
local_coco_json_path = "PATH_TO_instances_YEAR.json"  # .../instances_val2017.json for example

with open(local_coco_json_path) as json_file:
    data = json.load(json_file)

for image in data["images"]:
    image_url_list.append(image["coco_url"])

print("Number of URLs: {}".format(len(image_url_list)))
print("Example URL: {}".format(list(image_url_list)[0]))
output:
Number of URLs: 5000
Example URL: http://images.cocodataset.org/val2017/000000397133.jpg
Here we are choosing to upload the first 200 coco images from the url list.
amount_images = 200

dataset = client.get_dataset_by_name(dataset_name=DATASET_NAME)
upload_results = client.create_images_from_urls(dataset_id=dataset.id, image_url_list=image_url_list[:amount_images])
print(f"{amount_images} Images uploaded")
output:
200 Images uploaded
In case the dataset is not already attached to the project, this is done here, again wrapped in try/except in case they are already connected to one another.
project = client.get_project_by_name(project_name=PROJECT_NAME)
dataset = client.get_dataset_by_name(dataset_name=DATASET_NAME)

from datagym import APIException
try:
    client.add_dataset(dataset_id=dataset.id, project_id=project.id)
except APIException as e:
    warnings.warn(e.args[0])
Create image id dictionary that returns the internal DATAGYM image id when given an image name.
image_ids_dict = dict()

for image in dataset.images:
    image_ids_dict[image.image_name] = image.id

print(f'One example from the image_ids_dict:\n {{"{image.image_name}" : "{image_ids_dict[image.image_name]}"}}'
output:
One example from the image_ids_dict:
 {"000000476415.jpg" : "0e7cdfdb-db25-44a4-b362-b8a944f42382"}
Load coco labels from the respective jsons.
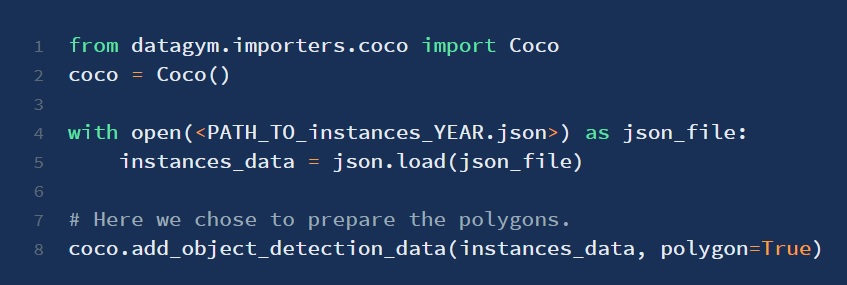
coco.add_object_detection_data is used for all instances__**__.json.
The when using the add_object_detection_data method you can either choose to upload the bounding box or the polygon containing the object.
coco.add_captions_data is used for all captions__**__.json.
coco = Coco()

with open("PATH_TO_instances_YEAR.json") as json_file:    # .../instances_val2017.json for example
    instances_data = json.load(json_file)
with open("PATH_TO_captions_YEAR.json") as json_file:    # .../captions_val2017.json for example
    captions_data = json.load(json_file)

coco.add_object_detection_data(instances_data, polygon=False)
coco.add_captions_data(captions_data)
Now that we have added all the relevant labels from their respective json files, we are ready to convert them into the uploadable DATAGYM json file. Here we will also print the first entry to show the format of this upload json.
upload_dict = coco.get_datagym_label_dict(image_ids_dict)

import pprint
pprint.pprint(upload_dict[0])
output:
{'global_classifications': {'caption': ['A table with pies being made and a '
                                        'person standing near a wall with pots '
                                        'and pans hanging on the wall.']},
 'internal_image_ID': 'd80e3cc7-1cbc-41a4-8889-d5bf83fb5ee5',
 'keepData': False,
 'labels': {'appliance': [{'classifications': {'appliance_type': ['oven']},
                           'geometry': [{'h': 98.37,
                                         'w': 192.56,
                                         'x': 1.36,
                                         'y': 164.33}]},
                          {'classifications': {'appliance_type': ['oven']},
                           'geometry': [{'h': 98.98,
                                         'w': 191.36,
                                         'x': 0.0,
                                         'y': 210.9}]},
                          {'classifications': {'appliance_type': ['sink']},
                           'geometry': [{'h': 28.61,
                                         'w': 122.01,
                                         'x': 497.25,
                                         'y': 203.4}]}],
            'food': [{'classifications': {'food_type': ['broccoli']},
                      'geometry': [{'h': 5.57,
                                    'w': 10.78,
                                    'x': 98.75,
                                    'y': 304.78}]},
                     ...
		     ],
            'furniture': [{'classifications': {'furniture_type': ['dining '
                                                                  'table']},
                           'geometry': [{'h': 186.76,
                                         'w': 346.63,
                                         'x': 1.0,
                                         'y': 240.24}]}],
            'kitchen': [{'classifications': {'kitchen_type': ['bottle']},
                         'geometry': [{'h': 57.75,
                                       'w': 38.99,
                                       'x': 217.62,
                                       'y': 240.54}]},
			...
			],
            'person': [{'classifications': {'person_type': ['person']},
                        'geometry': [{'h': 277.62,
                                      'w': 109.41,
                                      'x': 388.66,
                                      'y': 69.92}]},
                       {'classifications': {'person_type': ['person']},
                        'geometry': [{'h': 36.77,
                                      'w': 62.16,
                                      'x': 0.0,
                                      'y': 262.81}]}]}}
Finally we can upload our json file to our DATAGYM project. Before we do so, it is important to make sure the label configuration contains all the coco super-categories and a field for the caption upload. Make sure that all geometries contain a nested freetext classification with an export key with the following naming scheme. See our extensive [documentation](https://docs.datagym.ai/documentation/label-configuration/what-is-a-label-configuration) for more information on how to set up your label configuration.
upload_dict = coco.get_datagym_label_dict(image_ids_dict)

import pprint
pprint.pprint(upload_dict[0])
output:
==================== Geometries ====================

Rectangle: indoor
	 Freetext: indoor_type

Rectangle: vehicle
	 Freetext: vehicle_type

Rectangle: kitchen
	 Freetext: kitchen_type

Rectangle: sports
	 Freetext: sports_type

Rectangle: accessory
	 Freetext: accessory_type

Rectangle: person
	 Freetext: person_type

Rectangle: food
	 Freetext: food_type

Rectangle: appliance
	 Freetext: appliance_type

Rectangle: outdoor
	 Freetext: outdoor_type

Rectangle: electronic
	 Freetext: electronic_type

Rectangle: furniture
	 Freetext: furniture_type

Rectangle: animal
	 Freetext: animal_type

==================== Global classifications ====================

Freetext: caption
With your label configuration successfully set up you are now ready to upload your coco labels.
project = client.get_project_by_name(project_name=PROJECT_NAME)

errors = client.import_label_data(project_id=project.id, label_data=upload_dict)
Success! With just a few lines of code you are able to upload a coco dataset into a DATAGYM project using our Python API. Equipped with this pre-labeled data you can let your reviewers refine the labels within the DATAGYM application.
Check it out and register your DATAGYM account here – it’s free!
We hope you enjoyed our article. Please contact us if you have any suggestions for future articles or if there are any open questions.
